

For Canadian Growers!
Introducing Swift Blocker: The fastest soil blockers on the market.
Swift Blocker's mission is to make soil blocking fast and commercially viable for vegetable and flower farmers who want to grow sustainably. Born from years of frustration with conventional hand operated soil block makers, the creators of Swift Blocker focused on engineering plastic free tools made for speed and scalability. We can now eliminate a bottleneck associated with growing.
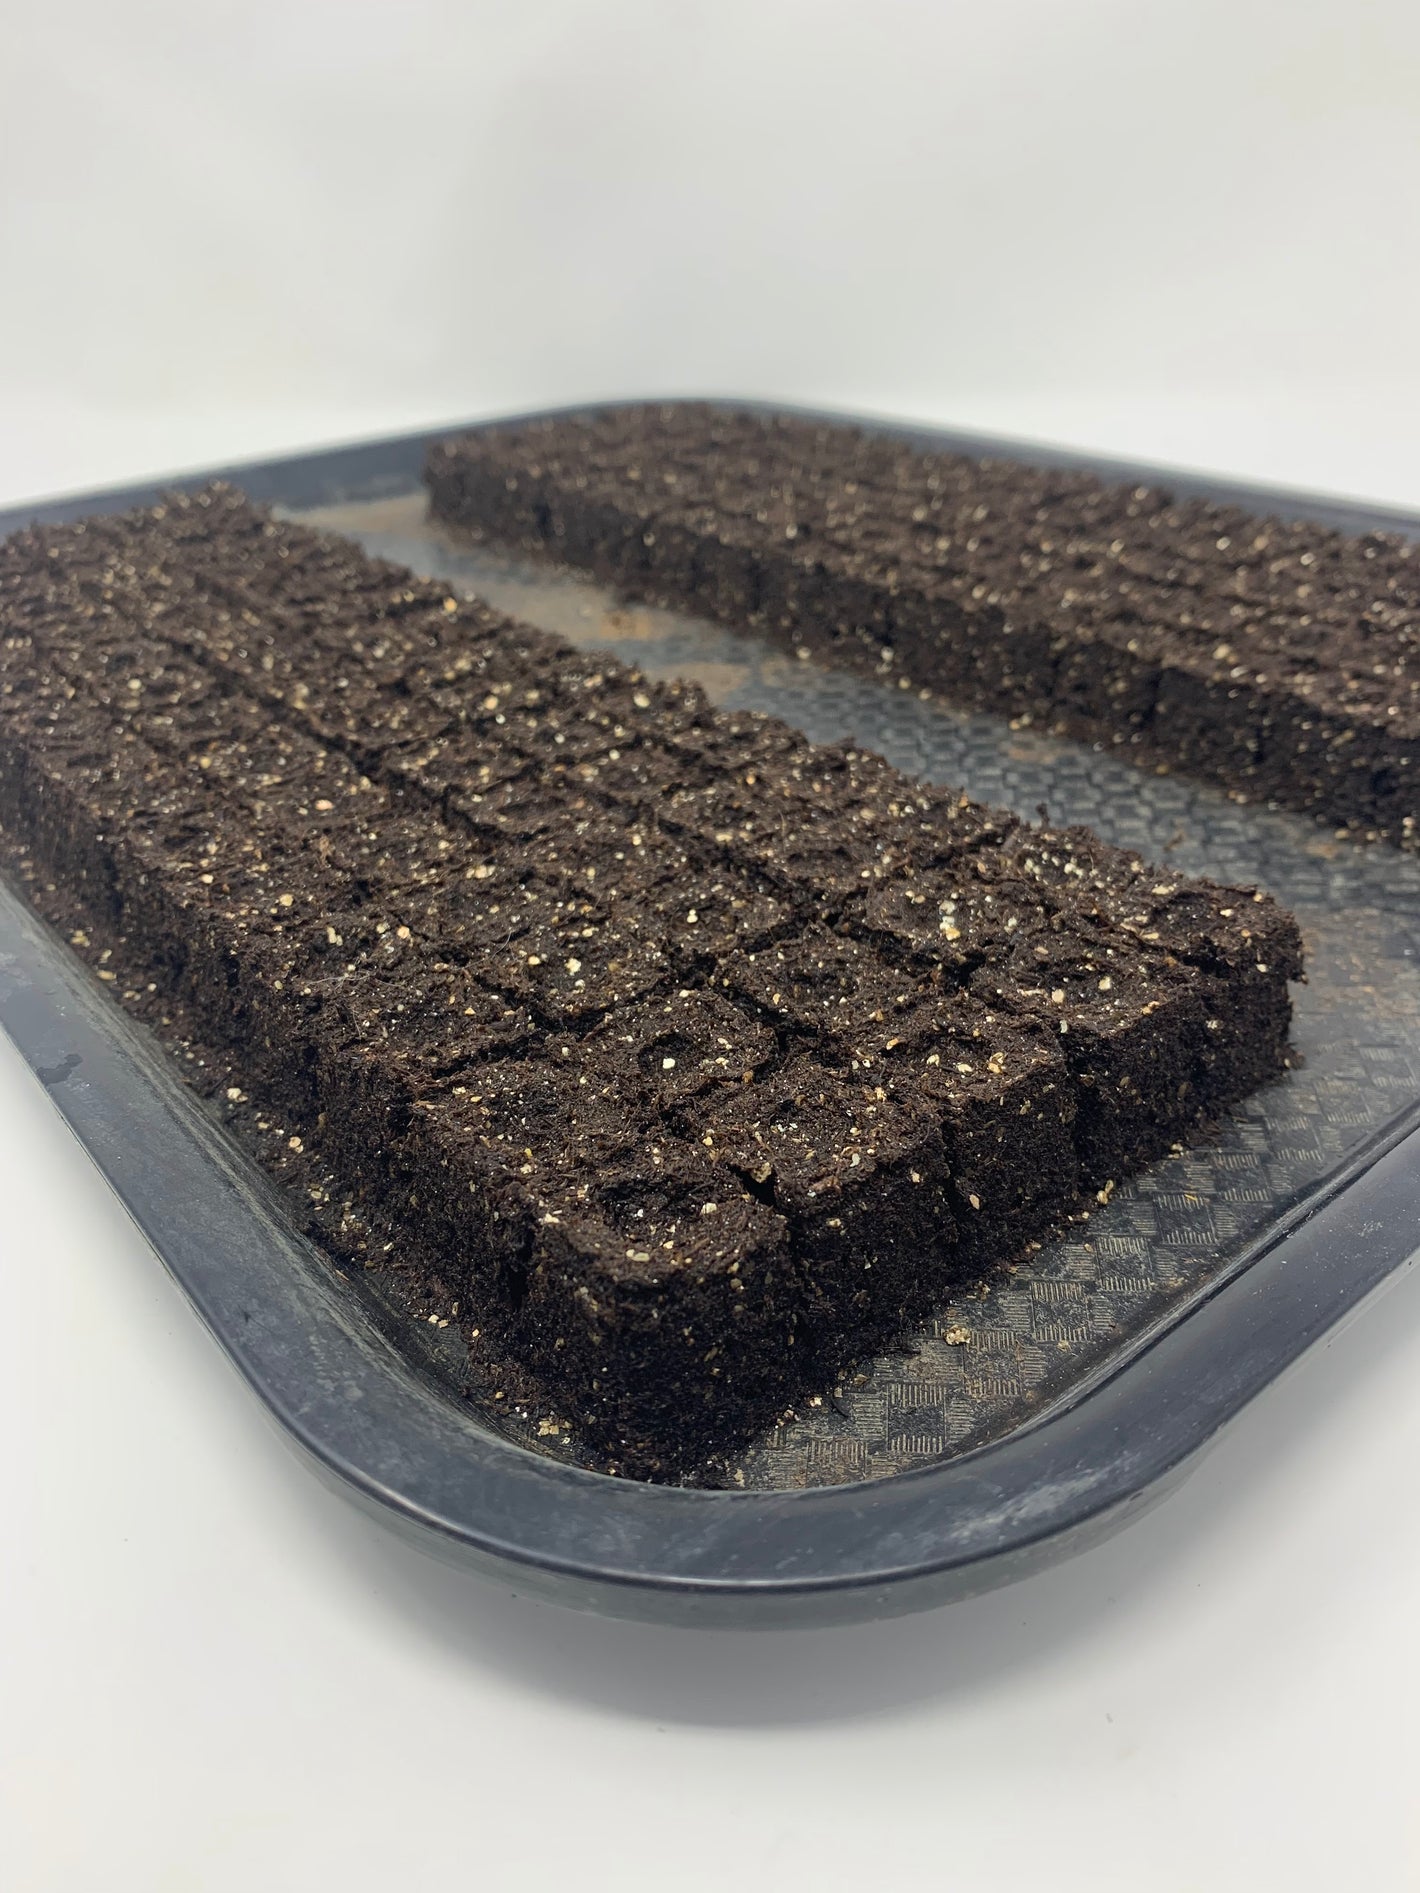
Made from heavy duty stainless steel, the soil block maker produces perfectly shaped soil blocks in minutes.
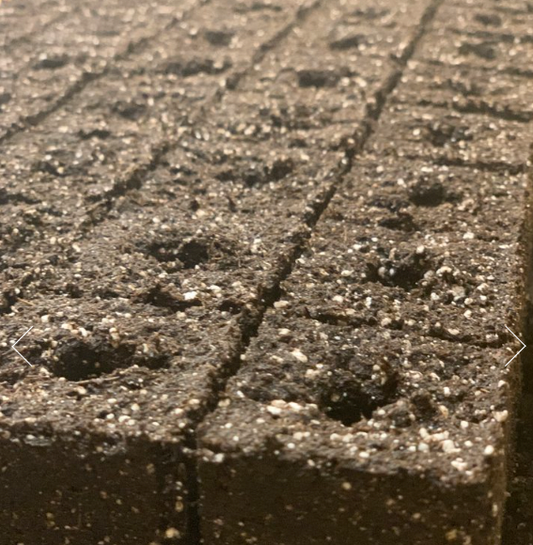
Seed your blocks before or after pushing them onto your tray. No more fractured blocks when inserting larger sized seeds.
-

FASTER
An entire tray of 200 soil blocks can be made in under two minutes. Compared to hand operated models, the Swift Blocker takes fractions of the time to make a perfect tray of blocks.
-

AFFORDABLE
Procuring cell plug flats can be expensive. The Swift Blocker cuts down on the initial investment needed to get you started in growing. At the end of the season, this system also eliminates the need for year over year replacement and wornout flats.
-
SUSTAINABLE
No more cell plug flats. No more plastic headed to the landfill.


Swift Blocker Product Collection
Shipping is charged based on product/weight
Nano Shipping: $30
Mini Shipping: $30
Commercial Shipping: $40
-

 Sold out
Swift Blocker 128 (Commercial)
Regular price $525.00 CADRegular priceUnit price per -
Swift Blocker 200 (Commercial)
Regular price $525.00 CADRegular priceUnit price per$499.00 CADSale price $525.00 CAD -

 Sold out
Swift Blocker 50 (Commercial)
Regular price $525.00 CADRegular priceUnit price per -
Swift Blocker 72 (Commercial)
Regular price $525.00 CADRegular priceUnit price per -
Swift Blocker Mini 27
Regular price $250.00 CADRegular priceUnit price per -
Swift Blocker Mini 75
Regular price $250.00 CADRegular priceUnit price per -
Swift Blocker Nano Series
Regular price $155.00 CADRegular priceUnit price per -
Swift Scraper
Regular price $45.00 CADRegular priceUnit price per


Swift Blocking Method
-
Fill
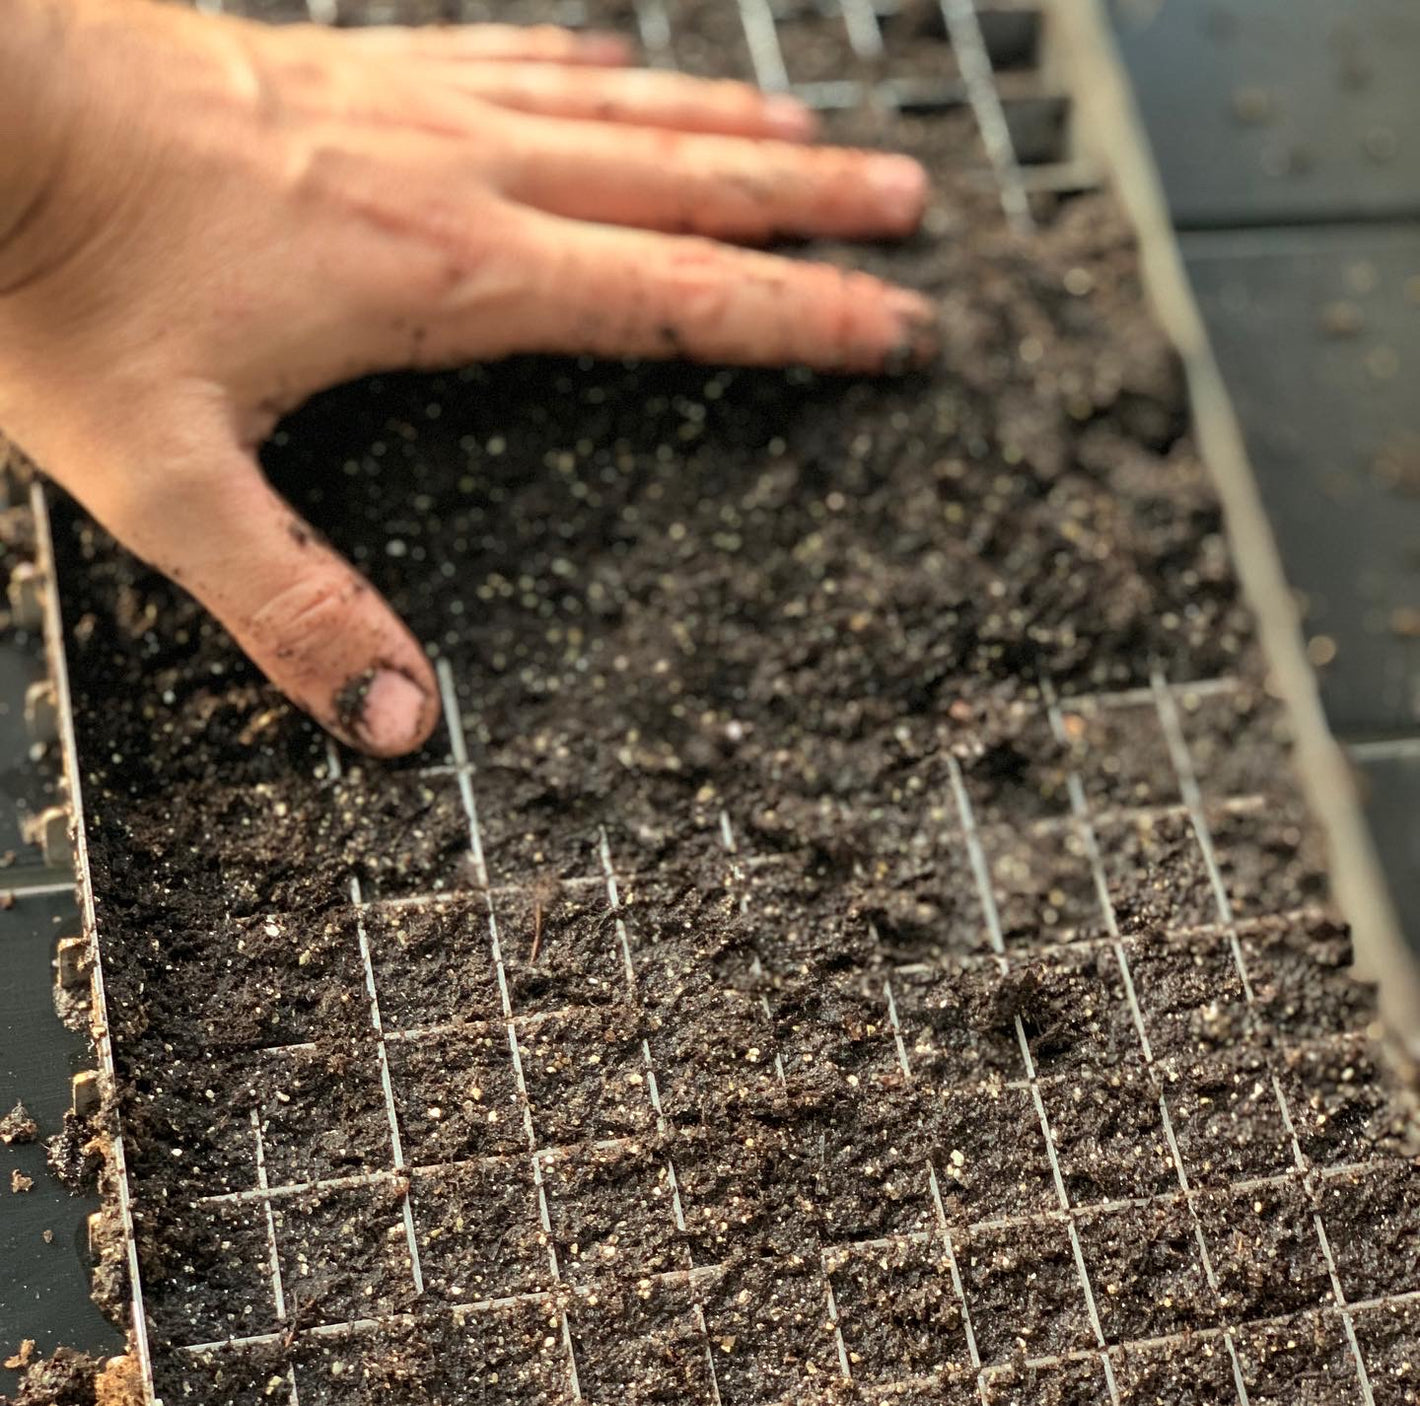
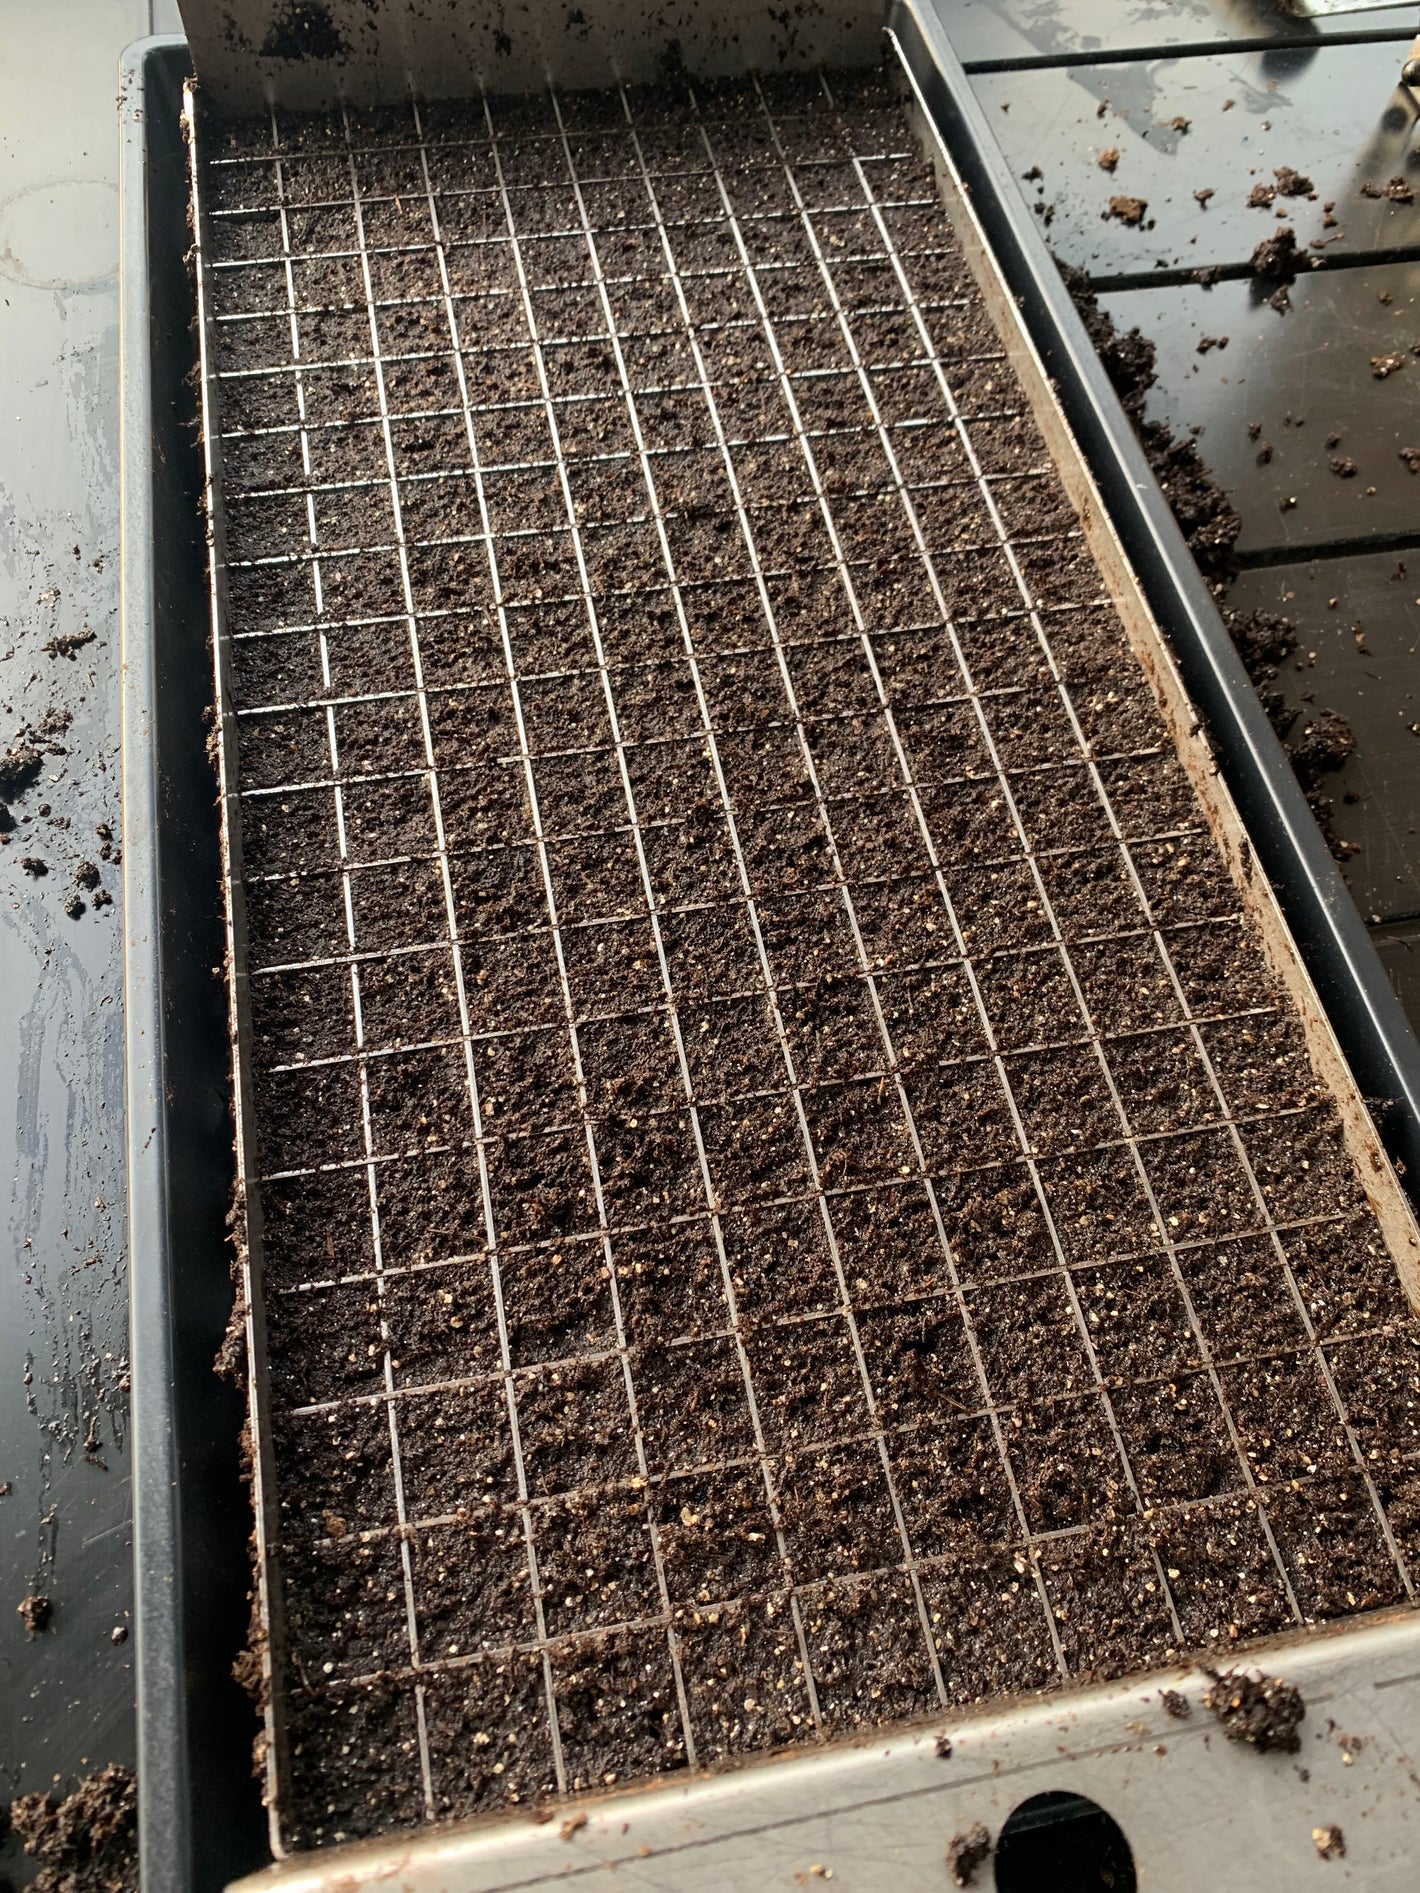
Place the bottom tray on a smooth worktable and fill it with your favorite soil blocking mix. We’ve found no need to sift as the block size allows for larger imperfections in soil consistency. Make sure to pack each corner and side for blocks to be consistent.
-
Set
Place the filled bottom tray in a 1020 or other growing tray. You can either proceed to Step 3 or place your seeds in the cells prior. We’ve found luck in seeding Zinnias, Marigolds, and even Sunflowers while the soil is in the bottom tray. Placing seeds prior to ejecting the blocks ensures solid seed to soil contact. Hint: A sheet of newspaper placed in the bottom of the tray prior to ejecting the blocks will give a flat surface for blocks to lay and also serve as a great wicking agent for watering.
-
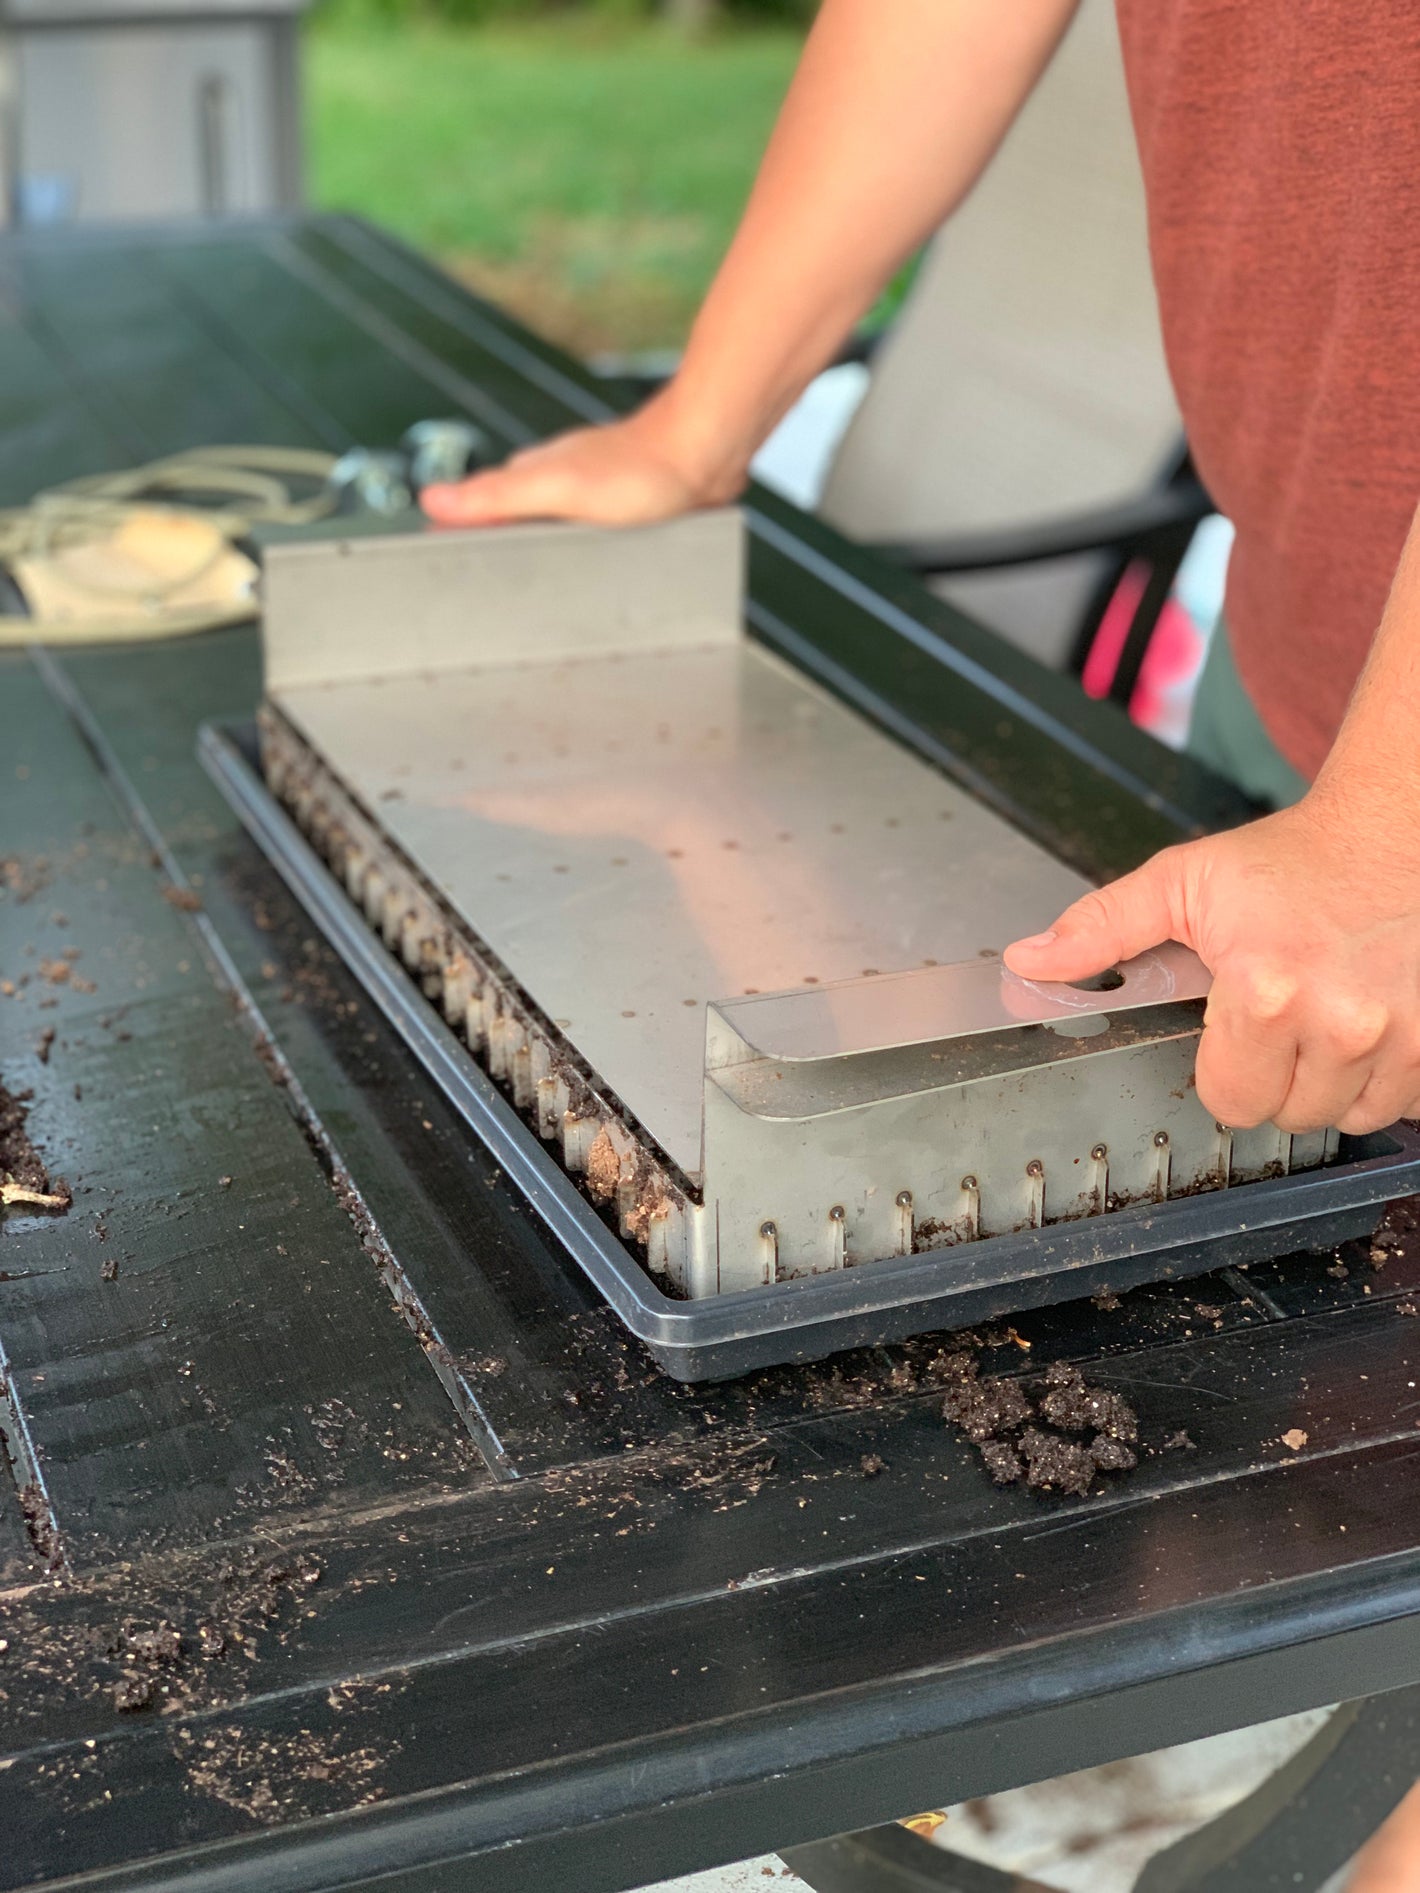
Squeeze
Place the top fixture on the bottom tray and give it a slight push down with both hands to make the dibbles contact the soil blocks. Grab both sides of the handles and squeeze the bottom tray upwards while holding the top fixture in place. We like to start with the end furthest from us and continue to squeeze until we feel the bottom tray move completely upward.
-
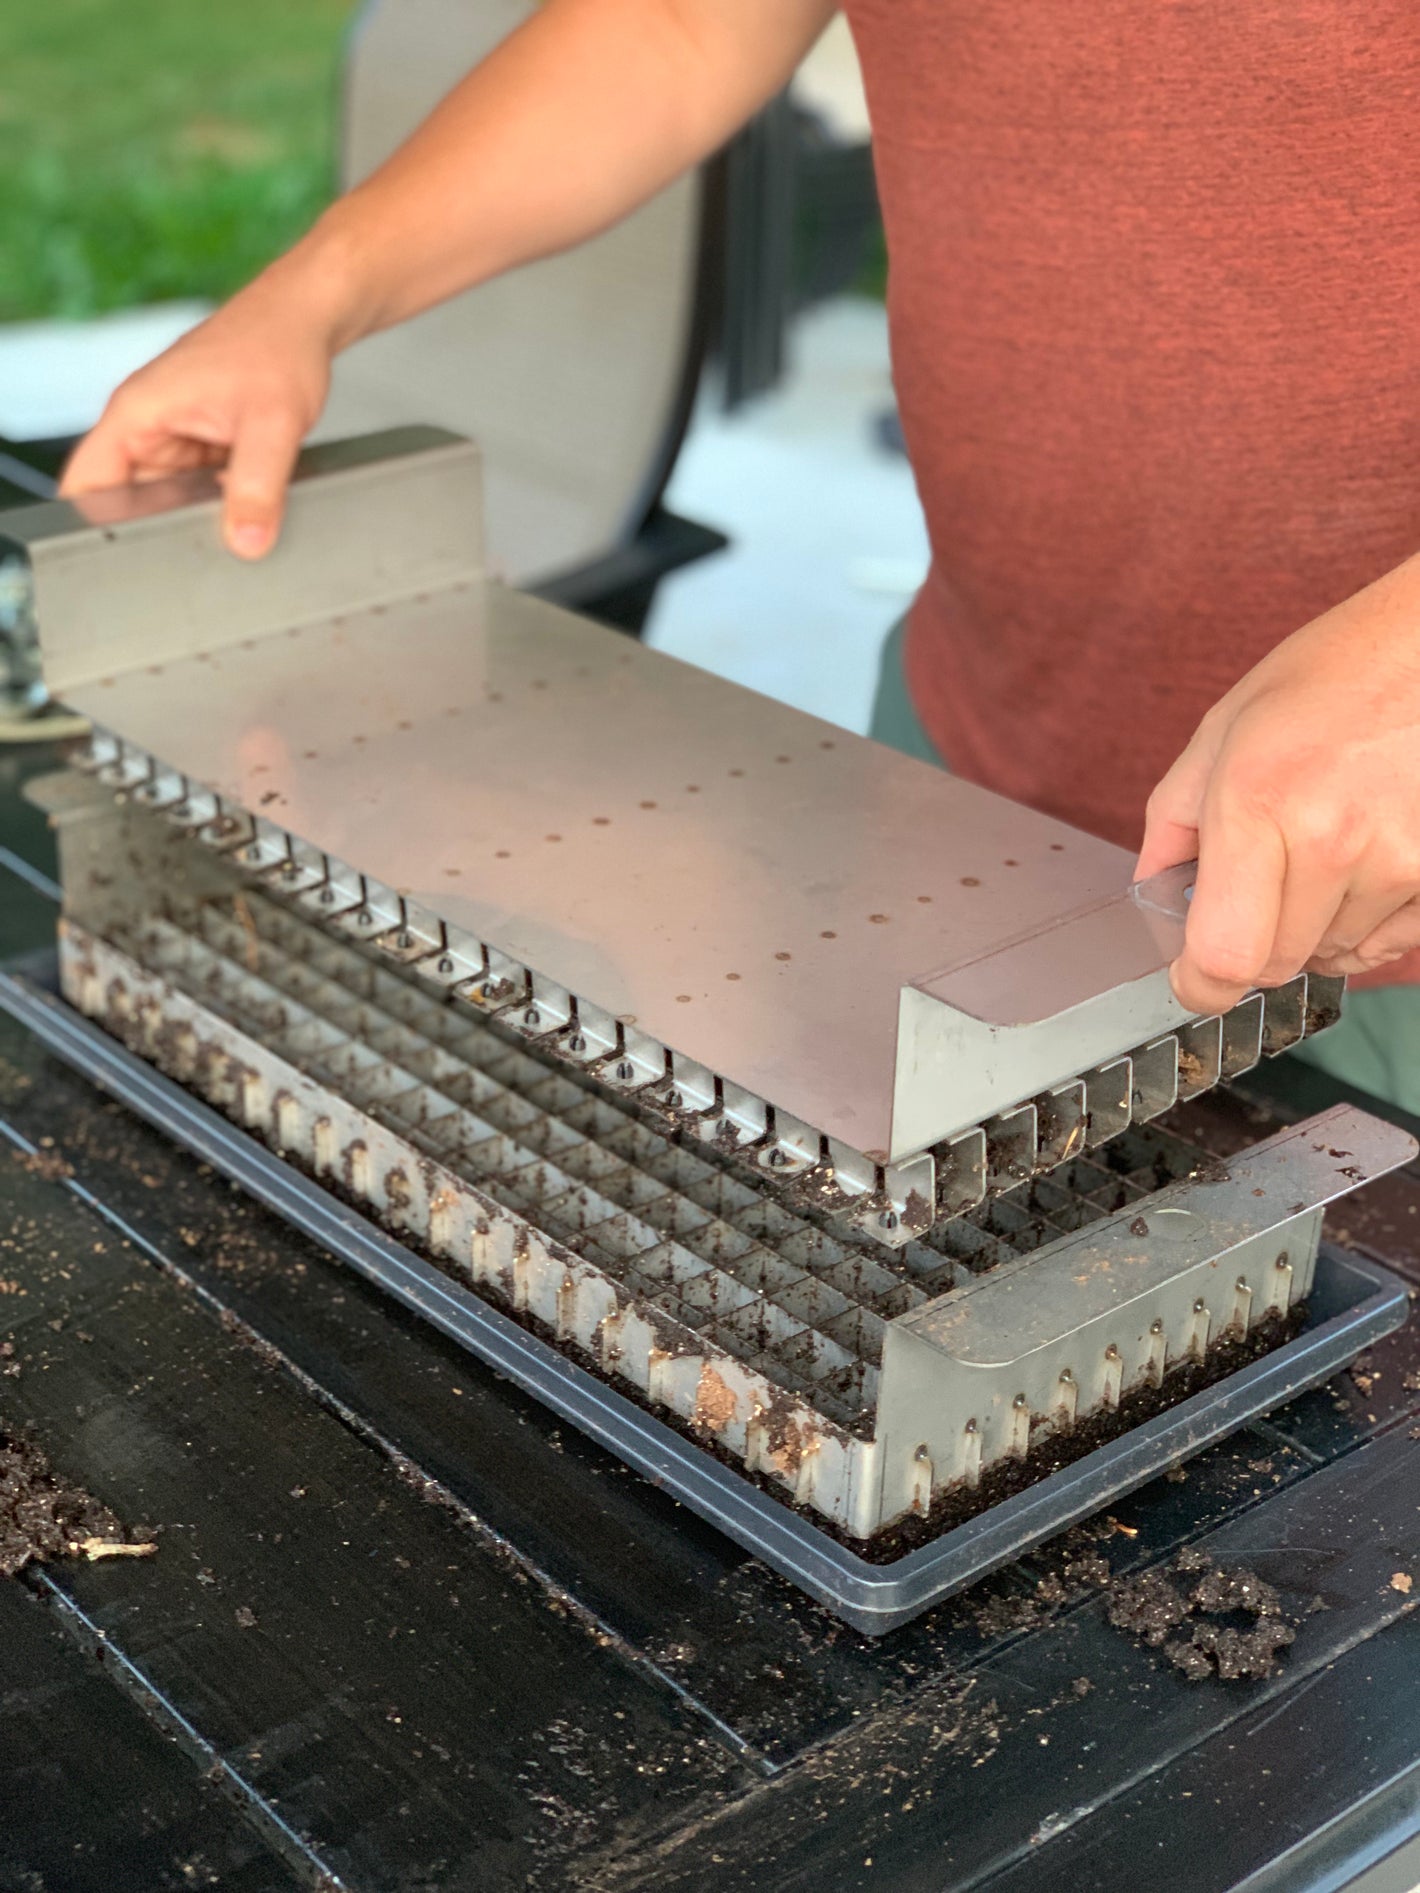
Remove Top
Remove the top tray slowly and set aside.
-
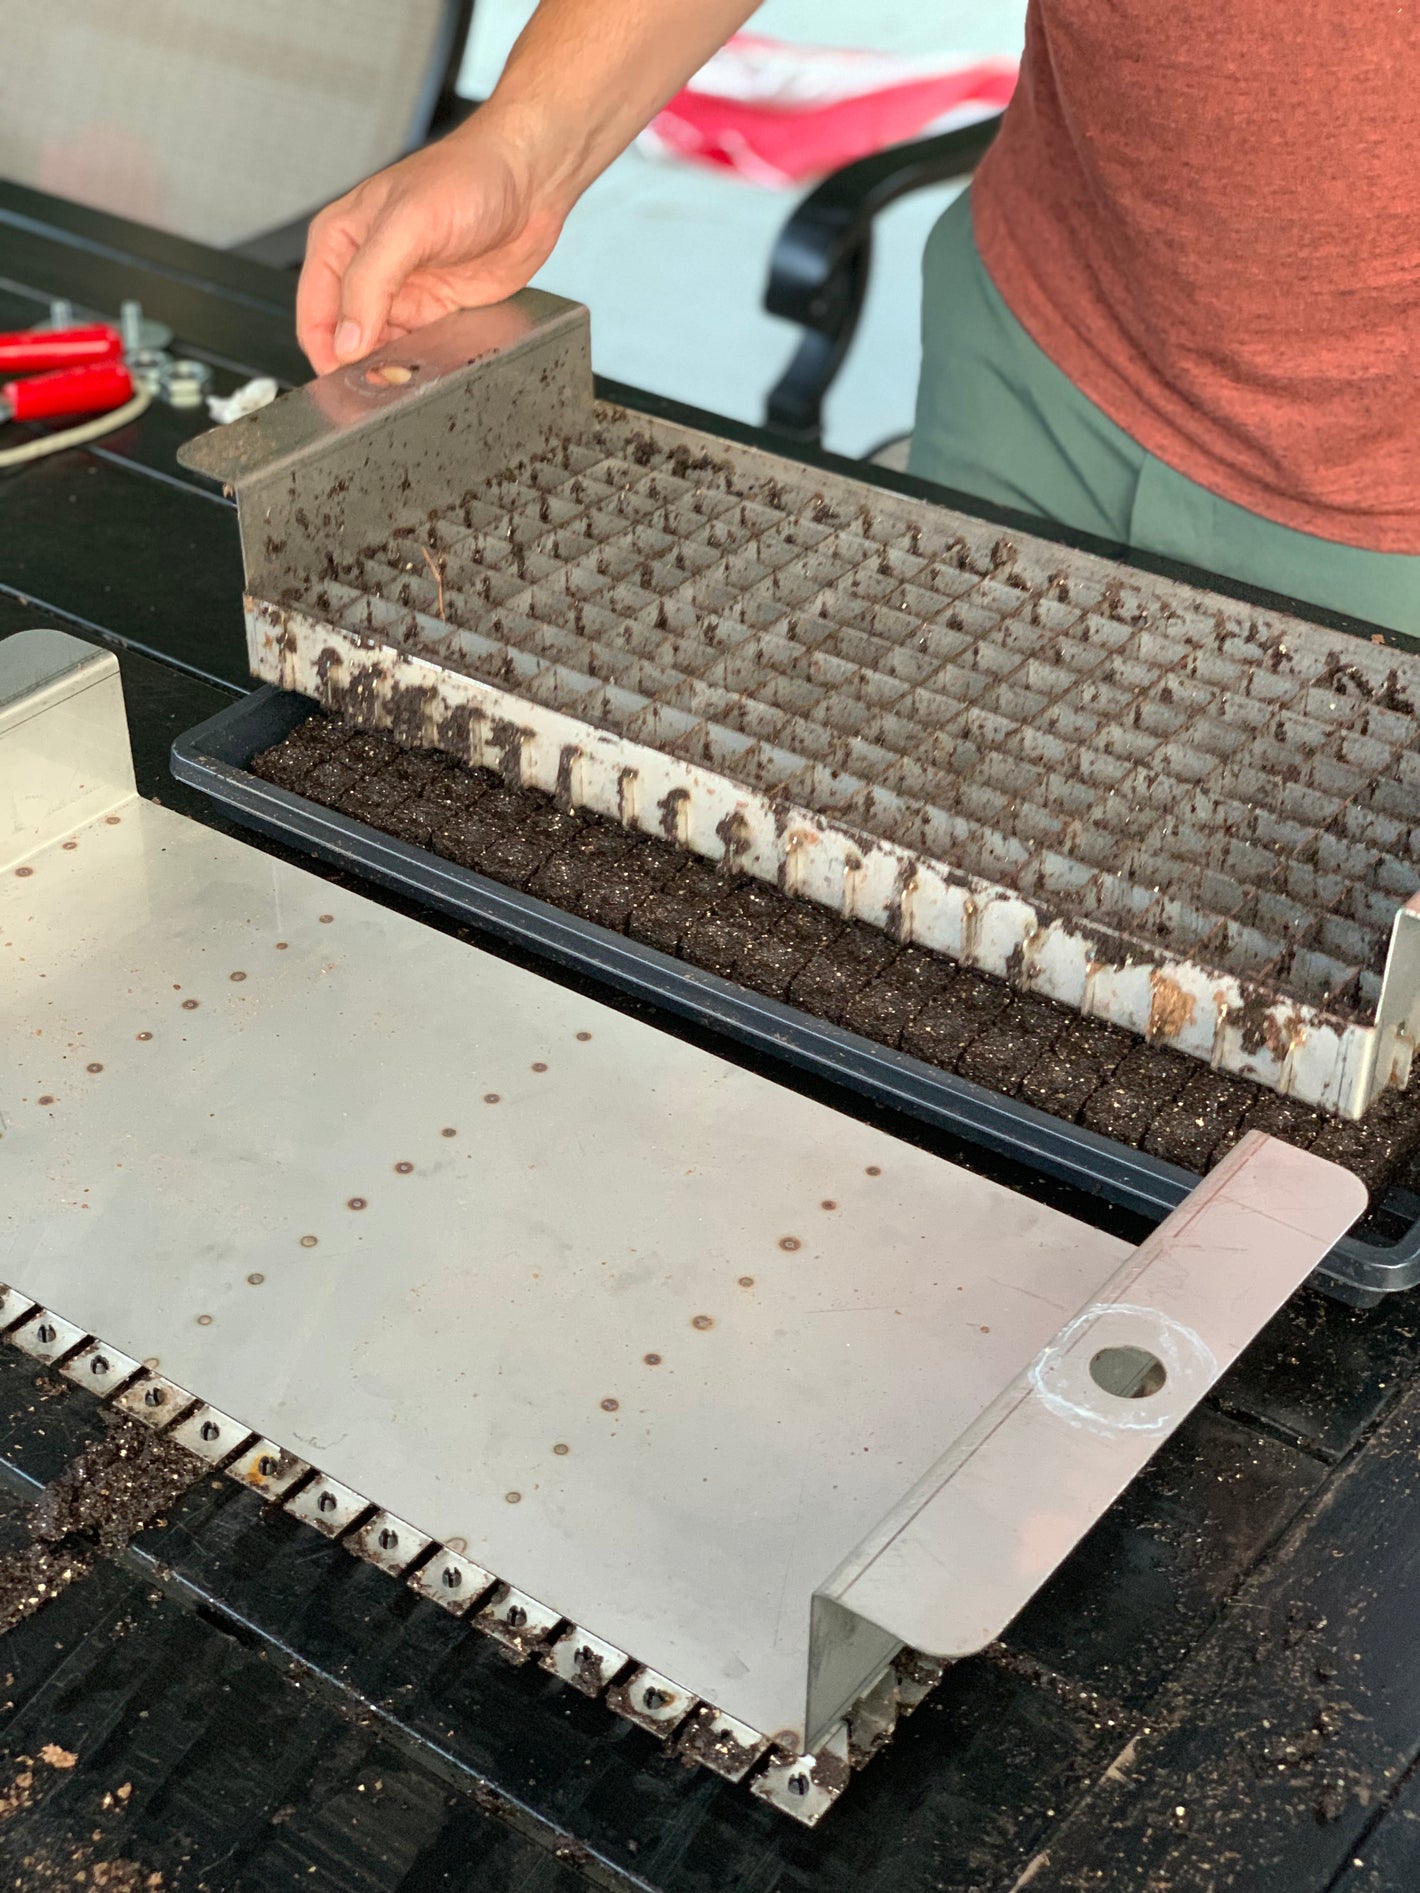
Remove Bottom
Remove the bottom tray and set aside. If the blocks are sticking, either add water to your soil mix or make sure to completely separate the top fixture before pulling bottom tray off the blocks.
-
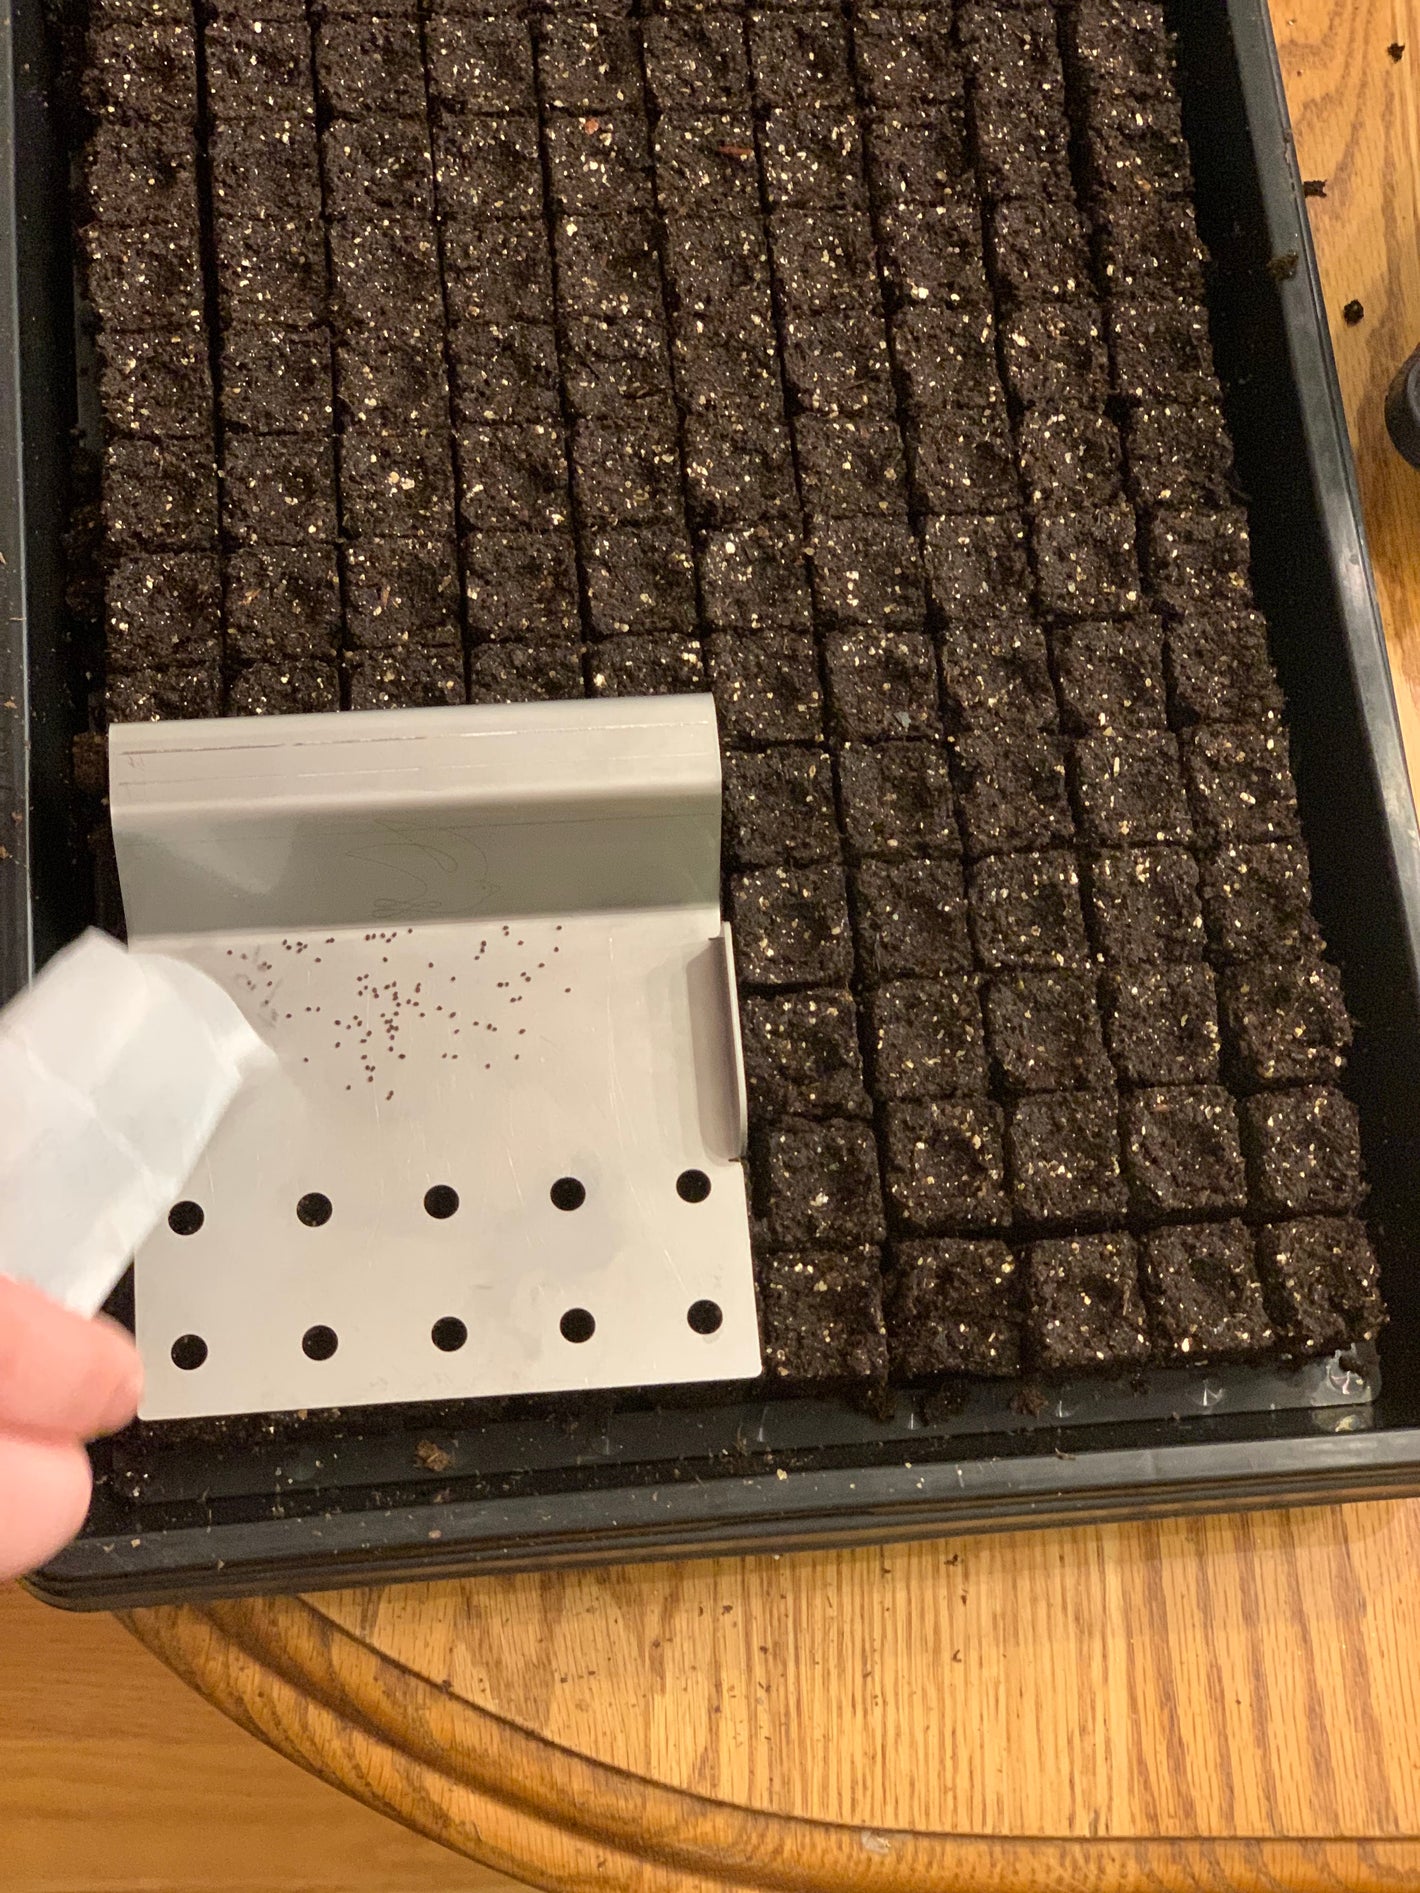
Seed
Seed the blocks and set aside for germination. Add vermiculite or cover in your favorite soil for seeds that need darkness to germinate.


